This is a checklist for the next stage of building your Oz Goose. Final steps before sealing the decks and doing any additional coating of the cockpit.
By now you know all about the coating. But there are some steps to make the boat more comfortable to sail.
This is mostly through the rounding of corners so they don’t dig into your poor sailor’s legs and butt!
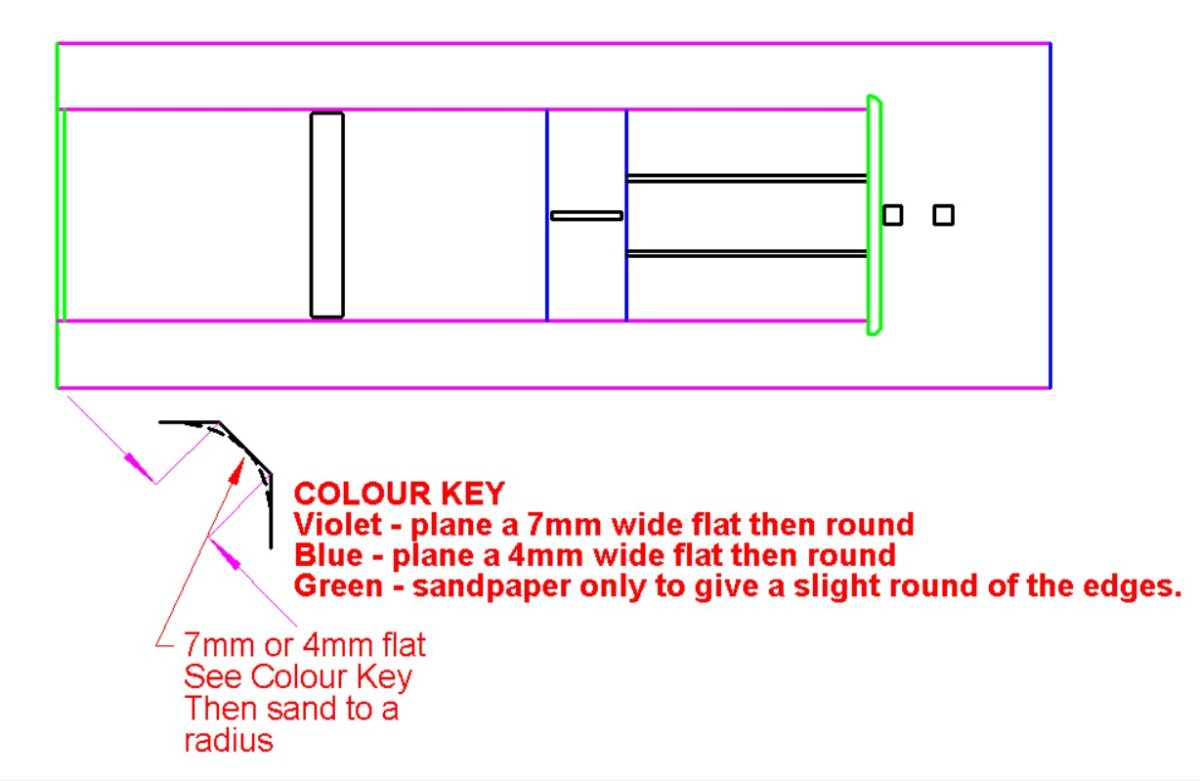
For sailor comfort plane a 7mm wide flat on the purple edges then round to a 12mm radius approx..
To prevent damage the blue edges are given a 4mm wide flat and then rounded for about a 6mm radius.
The green edges just have the sharp corners removed with a bit of quick sanding.
Boats with the bottom nailed on with the bronze ringed boat nails are ready to be coated with epoxy. Minimum 2 coats.
Boats with the bottom just glued on .. there is one extra step – optional for nailed boats
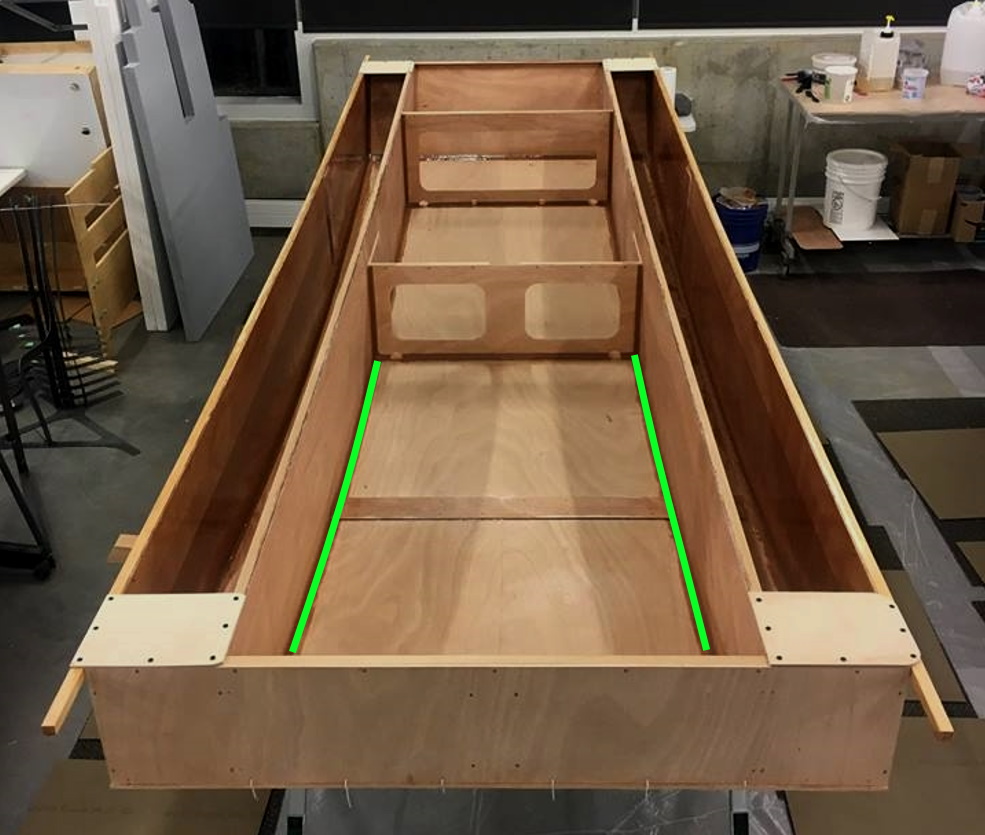
Over time (and I mean over years) we have seen small cracks appear in the join between the side tank and the bottom. The cracks DO NOT EVER GO RIGHT THROUGH THE BOTTOM and make the boat sink!
The Silicon Bronze ring nails reduce the risk.
But we recommend an epoxy fillet between the bottom and side tank in the crew area. THIS IS THE ONLY AREA WHERE WE RECOMMEND A FILLET. More fillets than this is a waste of materials and your effort.
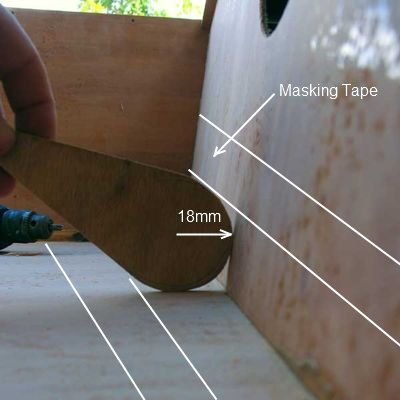
This is the dimension for the filleting tool made out of some scrap ply or part of a plastic container. As the fillet wil be 18mm wide there needs to be a small gap between it and the tape.
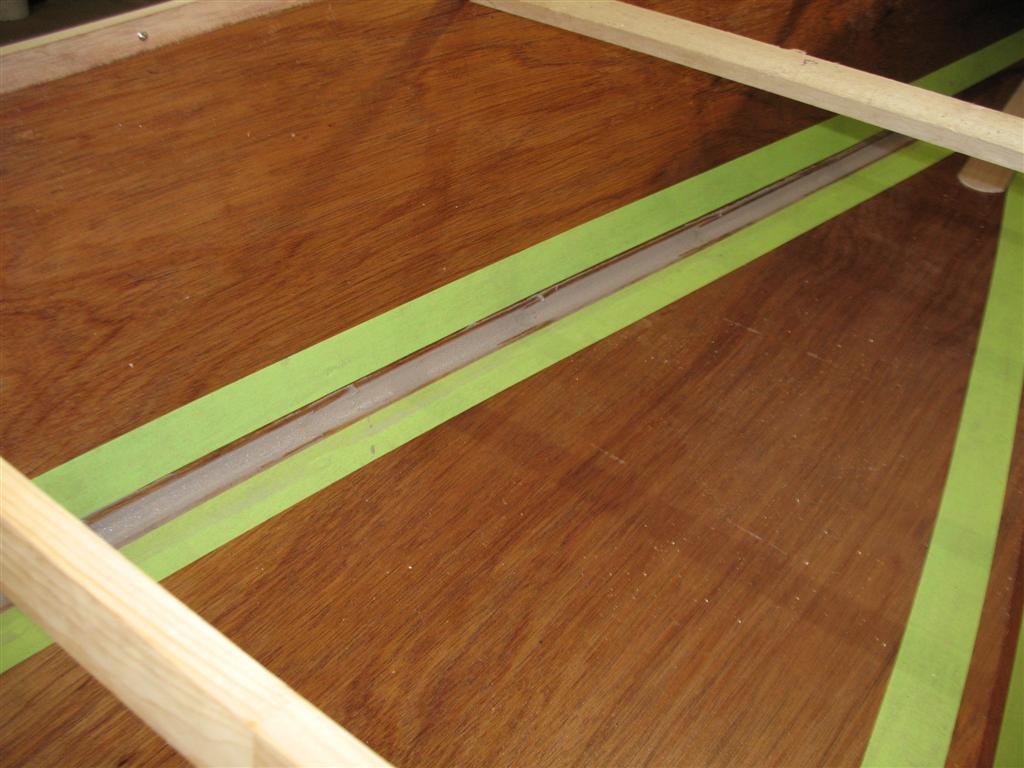
Here is a run through the epoxy filleting method on YouTube. You will know many of these techniques already from the earlier parts of the building. The epoxy needs to be about the thickness of peanut butter.