Fibreglassing is not always necessary but here is a detailed instructional video on applying glass using epoxy resin to an Oz Goose Sailboat hull.
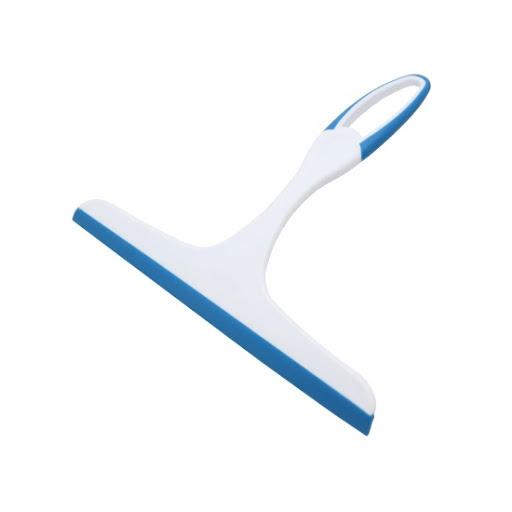
We use two types of squeegee that we use. We like them wide.
The ones in the image below are made from scrap plywood. But we also use commercial window cleaners like on the right.
Fibreglass is only necessary if the bottom ply is 5mm rather than the required 6mm
Note that fibreglass is not always required on an Oz Goose sailboat hull. The reason we use it here is that standard “one fourth” thick plywood is not a real quarter inch (6mm). It is actually 5mm which means it is not really stiff enough.
So we use a layer of 4oz (150gsm) or 6oz (200gsm) glass cloth.
The glass IS NOT NECESSARY AT ALL if the bottom plywood is 6mm thick. We just use 50mm (2″) wide glass tape along the edges.
If still wanting to glass a 6mm thick ply bottom then we often use a very light 2oz (80gsm) glass cloth as we have found that the presence of glass protects the timber more than having no glass at all. So we use the lightest possible.
If not fully glassing the bottom we use the glass tape and apply it the same time as epoxy coating the bottom. I have written out the method of fibreglass taping hull edges on my main boat design website
Prepare the edges of the ply panels for the glass cloth to go around
We don’t want all the edges of the ply the same.
For the back of the boat (stern transom) we want a really sharp edge so that the water breaks away cleanly as it separates from the hull.
No rounding at the back.
The glass will not go around this corner but be trimmed off to make a sharp edge. That is the finished edge we want.
How to round the sides and the front edge for the glass to go around
The Glass does go around the corners of the bow transom and the chine. Here I will show you how to do a neat and consistent radius.
This is only for the sides and the front of the boat.
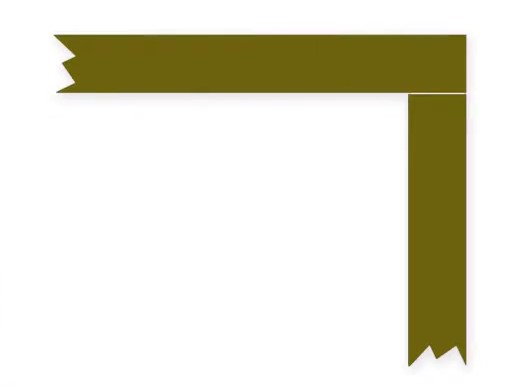
Step 1 is to do a sharp corner by trimming any overhanging ply with a plane for the final trimming.
A saw might be needed to trim down the bow or stern transom overhang depending on where the excess ply ends up.
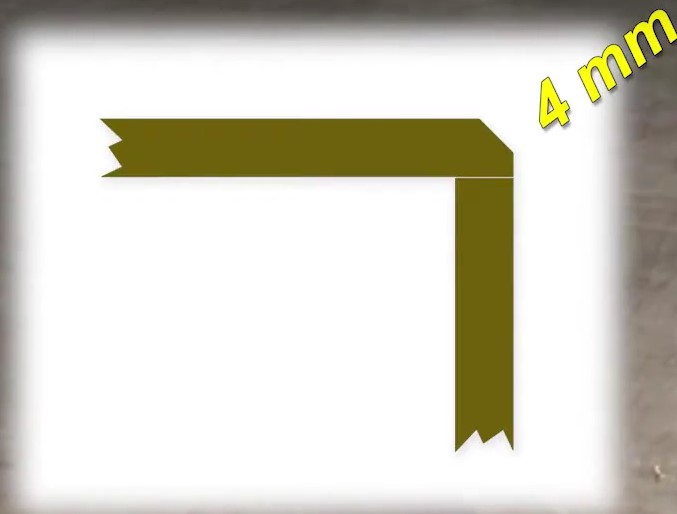
Step 2 is to plane a 45 degree bevel along the side and front of the boat. NOT the back.
The bevel is quite narrow at 4mm. The reason we make a bevel is that the human eye is really bad at estimating curves. But its easy to see the width of the 4mm flat surface.
This gives the corner a very consistent appearance.
Step 3 is to round the bevel to creat an accurate radius.
Use a sandpaper and block to make a consistent radius. Note the direction of the sanding in the video.
Afterwards rub your hand across the radius and feel for any sharp edges. Sharp edges will mean an air bubble under the glass cloth or tape so they must all be smooth to touch
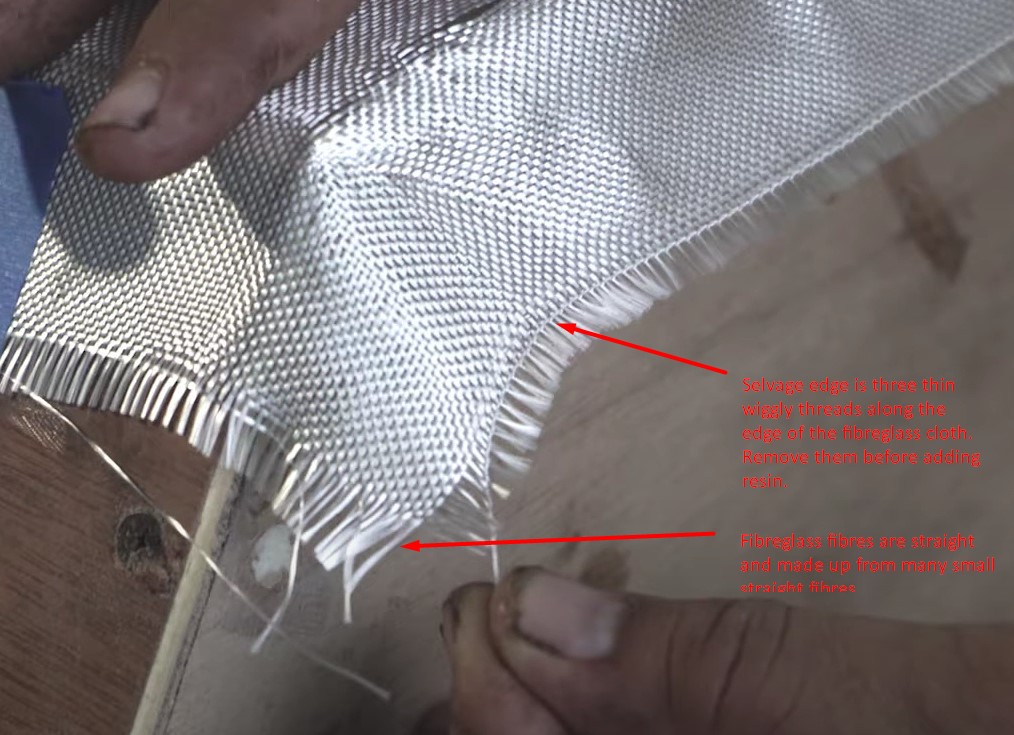
Removing the Selvage Edge from the Glass
Lay the glass out like the video. If your fibreglass is wide enough to not need a join that is great.
If needed a join like in the video there is no overlap.
It is really important to remove the selvage edge. These are two or three wiggly threads on the manufactured edge of the glass running along the length of the boat. If not removed they leave a really hard line that is hard to get rid of and will appear in the painting stage.
The Secret of not running out of time with mixed epoxy
Don’t do this in direct sun!!!
Trim the brush and make the squeegee BEFORE mixing epoxy.
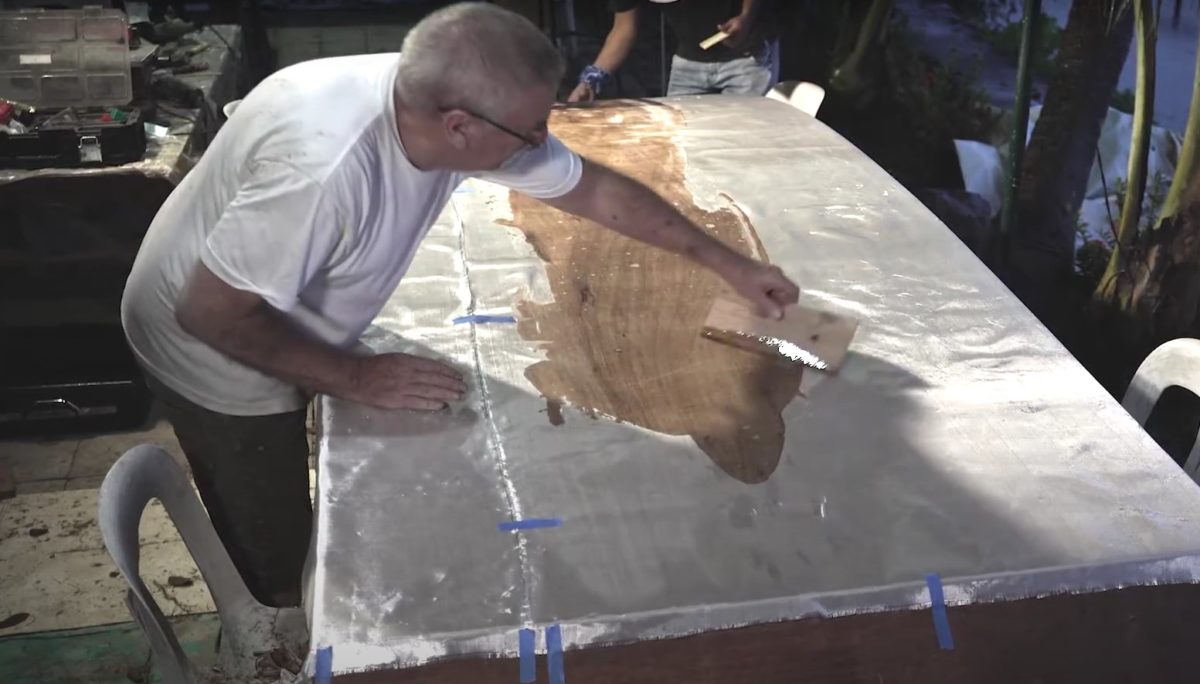
Follow the assembly guide and mix about 500g of epoxy – no powder. Mix it really well scraping the sides and bottom of the container until all the stripes in the epoxy have disappeared. Then mix a bit more.
Then pour the full amount of epoxy in the middle region of the hull. This ensures that the heat can get away and it slows down the curing of the epoxy. Spread it out quickly with the big squeegees.